null
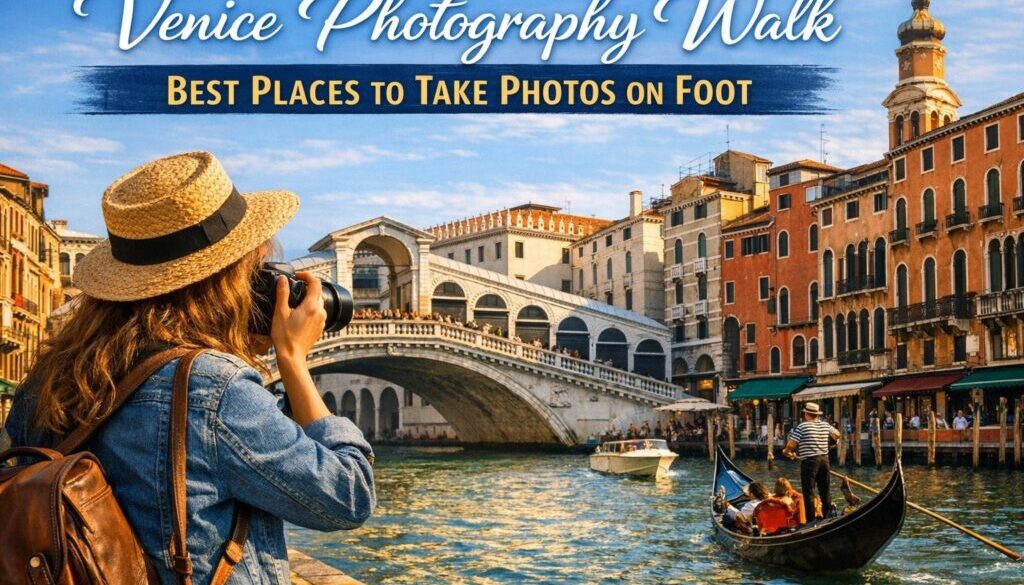
A good Venice photography walk is less about ticking off every landmark and more about moving through the city in smart clusters. Venice rewards travellers who slow down, cross a few bridges, follow a canal edge, and let the light and water do the work. If you want the best places to take photos on foot, focus on a route that links Rialto, San Marco, the Accademia area, the Zattere waterfront, and a quieter stretch through Cannaregio.
Quick Answer
The best Venice photography walk is usually a cluster-based route: start around Rialto for canal scenes, continue to St Mark’s Square and the basin, cross toward Accademia and Dorsoduro for wider waterfront views, then finish at Zattere or Cannaregio depending on the light and the pace you want.
That approach works because Venice is highly walkable, but bridges, narrow lanes, and crowds can make cross-city photography inefficient. The city is best experienced as a sequence of scenic pockets rather than a single loop. For route planning, official tourism information from Venezia Unica and the city’s tourism portal can help you understand how the main districts fit together.
Best Venice photography walk areas on foot
A strong Venice photography walk starts with the most photogenic areas you can reasonably link together on foot. The goal is not just to see famous places, but to move between viewpoints that offer different light, textures, and compositions.
Rialto Bridge and nearby canals
Rialto is one of the most useful places to begin because it gives you immediate classic Venice material: canal traffic, bridge lines, façades reflected in the water, and the constant movement that makes the city feel alive. It is also a natural place to photograph the energy of Venice early in the day, before the narrow walkways get too busy.
Keep your camera or phone ready for changing angles as you move away from the bridge. The nearby lanes and canals often provide better framing than the bridge itself, especially when you want quieter shots away from the central flow of people.
For a quick orientation before you go, it helps to view the location on Google Maps and understand how close Rialto sits to other photo stops.
St Mark’s Square and St Mark’s Basin
St Mark’s Square is the obvious headline stop, but for photography it works best when you treat it as part of a wider basin area rather than a single viewing point. The square, the surrounding arcades, and the open water nearby give you a mix of architectural detail and broad, atmospheric views.
In a Venice photography walk, this is where timing matters most. Early morning gives you the best chance of breathing room; later in the day the area can feel compressed by day-trippers and group traffic. Even if you only stay briefly, it is worth using the basin edge for wider frames and letting the square act as a transition point rather than your only target.
Accademia Bridge and the Dorsoduro waterfront
The Accademia area is one of the best places to shift from dense, iconic Venice to a more open and elegant waterfront feel. The bridge itself gives you strong canal views, while Dorsoduro’s edges offer long perspectives and a less frantic pace than the main tourist core.
This part of the route is especially useful if you want a more balanced Venice photography walk that includes both landmark architecture and calm water views. It also works well for travellers who prefer to stop, look, and compose without feeling rushed.
Zattere for wide-water views
Zattere is one of the best places to breathe after the tighter central streets. The wider waterfront gives you space, clearer sightlines, and a different kind of Venetian image: less about tight canal curves, more about light, open water, and distant movement.
It is a strong finish point for a late-afternoon walk because the long edge is ideal for slower pacing and softer light. If you are building a photo route rather than a general sightseeing plan, Zattere is where the city starts to feel expansive.
Cannaregio for quieter canal scenes
If you want a Venice photography walk with fewer obvious postcard moments and more atmosphere, Cannaregio is the district to add. The appeal here is not spectacle but texture: calmer water, everyday scenes, and more space to notice the details you might miss in the busiest areas.
Cannaregio is also useful for travellers who prefer a less compressed route. It can be combined with Rialto or used as a separate photography section when you want a quieter second half of the day.
San Giorgio Maggiore viewpoint via vaporetto
Not every strong photo stop in Venice is reached purely on foot. San Giorgio Maggiore is a useful example because the viewpoint is best treated as a vaporetto-assisted add-on rather than a walking-only stop. From there, you can get a different perspective on the city and the water around it.
If your aim is to capture Venice from a distance as well as within its lanes, this is worth including. It can also help break up a long walking day and give you a fresh visual angle after the denser central sections.
Ready to Explore Venice?
Discover Venice at your own pace with a Walkables self-guided audio walking tour.
The best time to walk for photos
The best light for a Venice photography walk is usually early morning or late afternoon. That is when the city feels more forgiving visually and, in many places, more manageable on foot.
Early morning for fewer crowds
Early morning is the most practical time to photograph Venice if you want cleaner compositions and less pressure from pedestrian traffic. This is especially true around Rialto and St Mark’s, where movement becomes more complicated once the day gets going.
Morning light also tends to suit the reflective quality of the canals. Even a simple smartphone shot can look better when the water is calmer and the streets are not full of overlapping movement.
Late afternoon and sunset for softer light
Late afternoon gives the city a warmer tone and can make stone, water, and façade details feel more layered. Zattere and the basin areas are especially rewarding at this time because the light helps separate buildings from water and sky.
For a traveller with only one full day, it is often better to plan a compact route with one early session and one late session than to try to cover everything in a rush.
Why timing matters in peak season
Venice is designed for walking, but crowd density changes the experience more than many first-time visitors expect. The same route can feel efficient at sunrise and frustrating at midday. That is why the smartest Venice photography walk is built around timing as much as location.
For current visitor rules and city updates, check the official city sources at Comune di Venezia and the access-fee portal at cda.ve.it if you are visiting as a day-tripper on a controlled date.
How to plan a realistic Venice photography route
The most efficient way to approach a Venice photography walk is to cluster locations by district and accept that the city is partly a walking route and partly a water-bus route. Trying to force everything into one continuous loop usually wastes time.
Cluster locations by district
A practical route might look like this: Rialto in the morning, St Mark’s area next, Accademia and Dorsoduro after that, then Zattere or Cannaregio depending on the mood you want and the time you have. That sequence keeps your walking logical and reduces backtracking.
This is especially helpful for photographers carrying even a modest camera setup. Venice’s bridges and foot traffic slow you down, so each extra detour matters more than it would in a conventional city.
Combine walking with vaporetto segments
The vaporetto is not a compromise; it is part of a smart photography strategy in Venice. It can help you move between districts without burning time on repetitive crossings, and it lets you save energy for the sections where walking is actually the best choice.
If you want to make the most of this, use a mix of walking and water transport rather than committing to one or the other. The official transport information on Venezia Unica is the best place to check how that fits your route.
Allow extra time for bridges and crowds
What looks close on a map may take longer in practice. Bridges, pauses for photos, and slow-moving pedestrian flow all add time. A route that seems compact on paper can feel surprisingly full once you start stopping for every new angle.
Build in more time than you think you need. In Venice, the best photo walks are not the ones that cover the most ground; they are the ones that leave you enough time to notice details.
💡 Walkables Travel Tip
Download offline maps before you start walking. Venice’s lanes and bridges can be confusing even when you know where you are going, and a photo-first route works better when you can check the next stop without relying on patchy signal.
What to know before you go
A good Venice photography walk is not just about composition. It is also about staying flexible, carrying the right tech, and understanding a few local realities that can affect the day.
Venice day-tripper access fee rules
Venice has an access fee for day visitors on selected dates, and the rules can vary by date and exemption category. If you are coming in for a short photo-focused visit, it is worth checking the official portal before you travel so you are not surprised by registration or QR-code requirements.
That matters even if your plan is simple: arrive early, walk a few scenic districts, and leave before the city feels crowded. The rules can still apply depending on the date.
Pickpocket and security precautions
In crowded tourist areas, keep your phone, wallet, and camera secure. That advice matters most around the places people naturally stop: Rialto, St Mark’s Square, vaporetto boarding points, and any narrow junction where pedestrians slow down together.
Smartraveller’s Italy advice is worth reviewing before departure, especially for Australians who want up-to-date guidance on theft awareness and general travel safety.
Photography gear limits and tripods
Bring compact gear. Public photography is generally fine, but larger setups can be awkward in crowded historic spaces and may not suit every location. A small camera or phone with good low-light performance is often the easiest option for Venice.
If you are planning more serious photography, check individual venue guidance where relevant rather than assuming every spot will work for a tripod or lights. A flexible setup will usually give you more freedom on the move.
Connectivity and offline maps
Venice is a city where mobile data is genuinely useful. It helps with navigation, transport checks, photo uploads, and last-minute changes to your route. Because signal can vary in narrow lanes or under bridges, it is sensible to have both an offline map and an active data connection.
If you are deciding between roaming and an eSIM, learn more about Wise only if you also need a simple way to manage travel spending while abroad. Walkables may receive a commission if you sign up through that link. For day-to-day device support, it is also worth checking your phone’s eSIM compatibility through Apple’s support pages or your carrier before departure.
Practical travel tips for Australian visitors
For Australians, a Venice photo trip is usually straightforward, but a few details make the experience smoother. Short stays in Italy generally fall under Schengen tourism rules, so checking your passport validity and travel dates before you go is essential. For current guidance, the Australian Government’s Italy travel advice is the most useful starting point.
Money is also worth thinking about before you land. Italy uses the euro, and contactless payments are common, but small purchases may still be easier with a card, mobile wallet, or some cash in reserve. If you like to keep travel spending organised, you can consider Wise for travel spending. Walkables may receive a commission if you use that link.
For connectivity, an eSIM or international roaming plan can help you navigate, upload photos, and move between districts without stress. If your route includes multiple stops and you want the flexibility to change plans on the go, reliable data is worth prioritising.
Want to Discover More on Foot?
Explore Walkables self-guided audio experiences and discover destinations at your own pace.
How a self-guided audio walk fits this trip
A self-guided audio experience works particularly well in Venice because the city rewards curiosity between the headline sights. A good route is not only about arriving at a viewpoint; it is about understanding why one canal feels calmer than another, why a bridge changes the sightline, and how the city shifts as you move district to district.
That is where a Venice photography walk becomes more than a checklist. With a self-guided audio approach, you can explore self-guided walking tours that keep you moving at your own pace while still giving you context as you go. Press play, follow the route, pause for photos, and continue when you are ready.
If you want to browse other ways to build a more complete day, the approved browse tours and activities link can help you compare local experiences. Walkables may receive a commission if you use that affiliate link.
Used well, a self-guided audio walk gives you the freedom to linger where the light works, skip what feels crowded, and move on when a scene has done its job.
Final thoughts
The best Venice photography walk is the one that respects the city’s pace. Start with Rialto, St Mark’s, Accademia, Zattere, and Cannaregio, then shape the day around light, crowds, and how much you want to carry. Add a vaporetto segment if it helps you conserve energy or reach a stronger viewpoint such as San Giorgio Maggiore.
For travellers who like to explore at their own pace, Venice is one of Europe’s most rewarding cities to walk with a camera or phone in hand. Plan carefully, move lightly, and leave room for the unexpected view around the next corner.
For route orientation, you can always view the area on Google Maps before you set out.